Qasa guides
Association staff guide
For Saudi Coffee Association staff who run the memberships and the establishments.
- Everything waiting for your decision in one list every morning.
- Applications, payments, members and establishments, with search, filters and export.
- Messages and reminders that send themselves, and a log of everything that happened.
01 Chapters Overview and the renewals radar
The association dashboard is your daily workplace: applications, members, establishments and records. Open each section from the side menu, and find any member, application or establishment from the “Search the dashboard” box at the top. Everything you do is written to the audit log under your name. You come back to this guide from “Help” in the dashboard’s top bar.
Chapter 1
Overview and the renewals radar
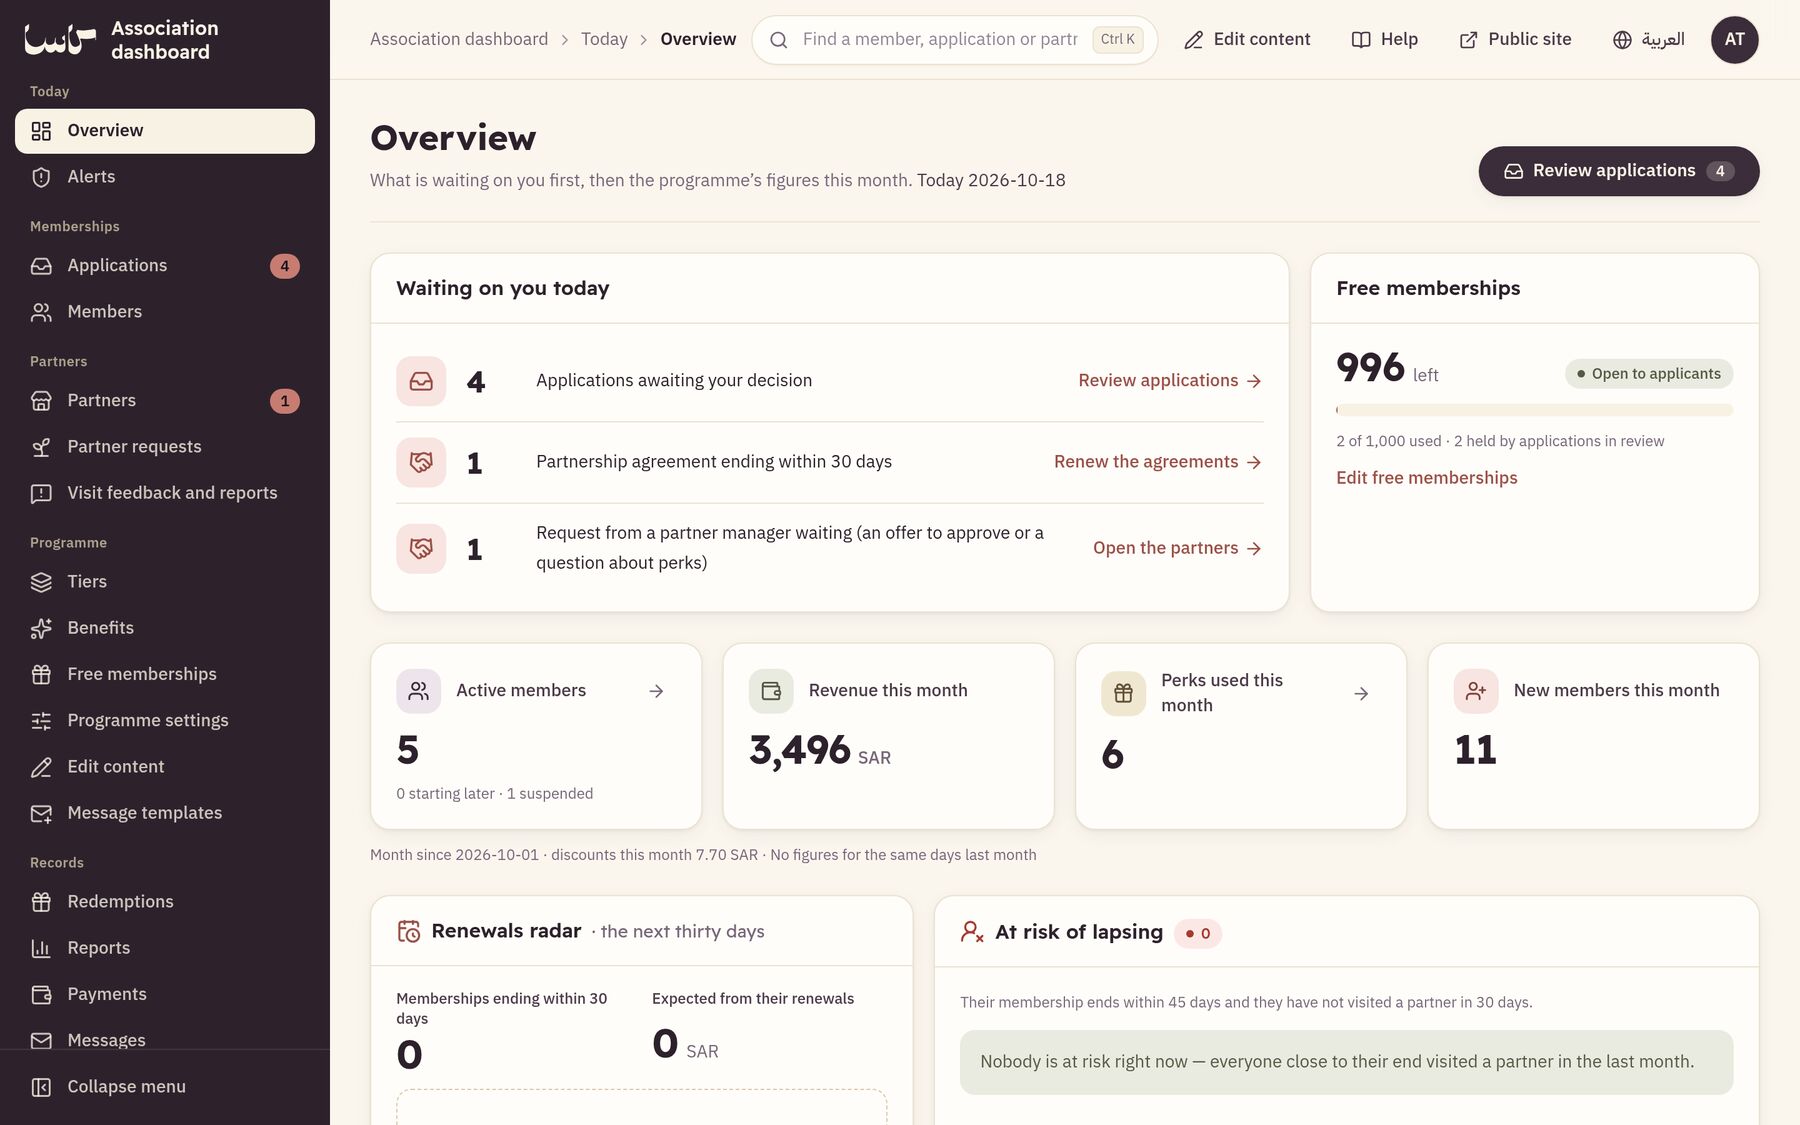
The first thing you see on signing in: what is waiting for you today, then the month’s figures.
 1245
- In the side menu, open “Overview”.
- Under “Waiting on you today” you find applications waiting for review, those past the promised review time, establishment requests and messages that failed. Press any of them to go there.
- Follow the month's figures: members in force, the month's revenue, coupons sold and new members, against the same stretch of last month.
- In the “Renewals radar” you see whose membership ends within thirty days, and the revenue expected if they renew.
- Under “At risk of lapsing” you see who is close to their end and has not visited any establishment for a month; press “Send this list a reminder”.
Up close— The parts the steps talk about, enlarged.
-
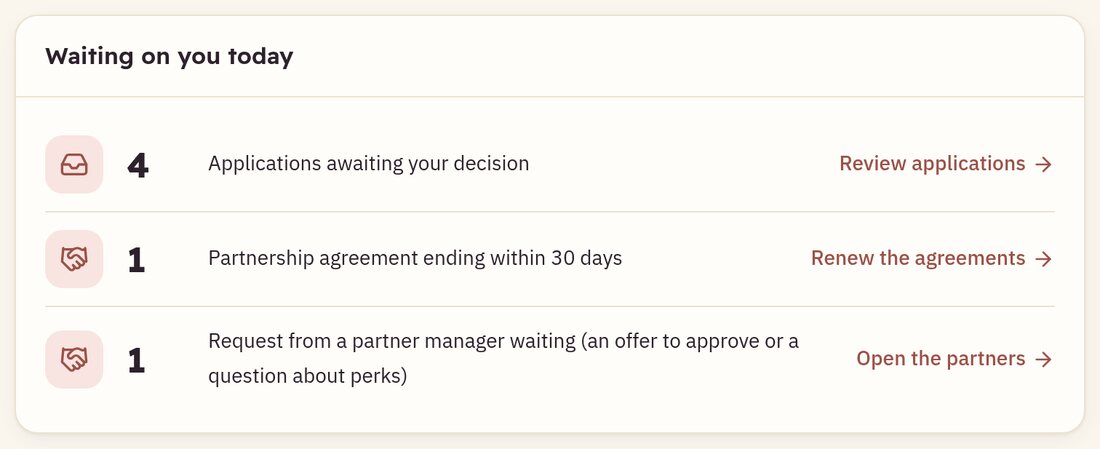
The “Waiting on you today” list
-
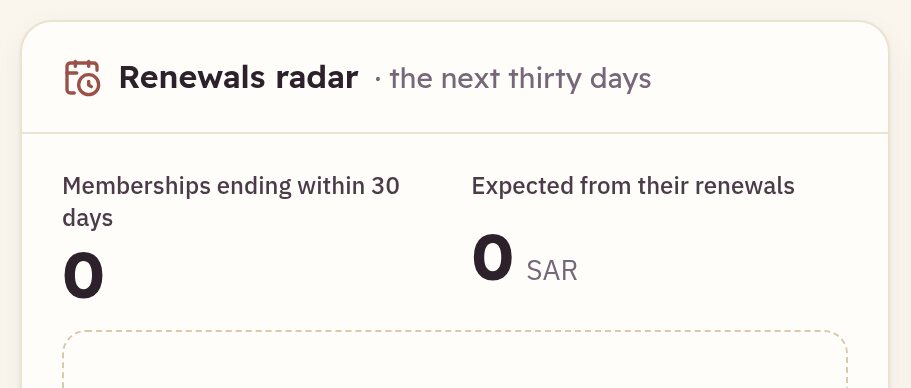
The renewals radar
Chapter 2
Applications: review and approval
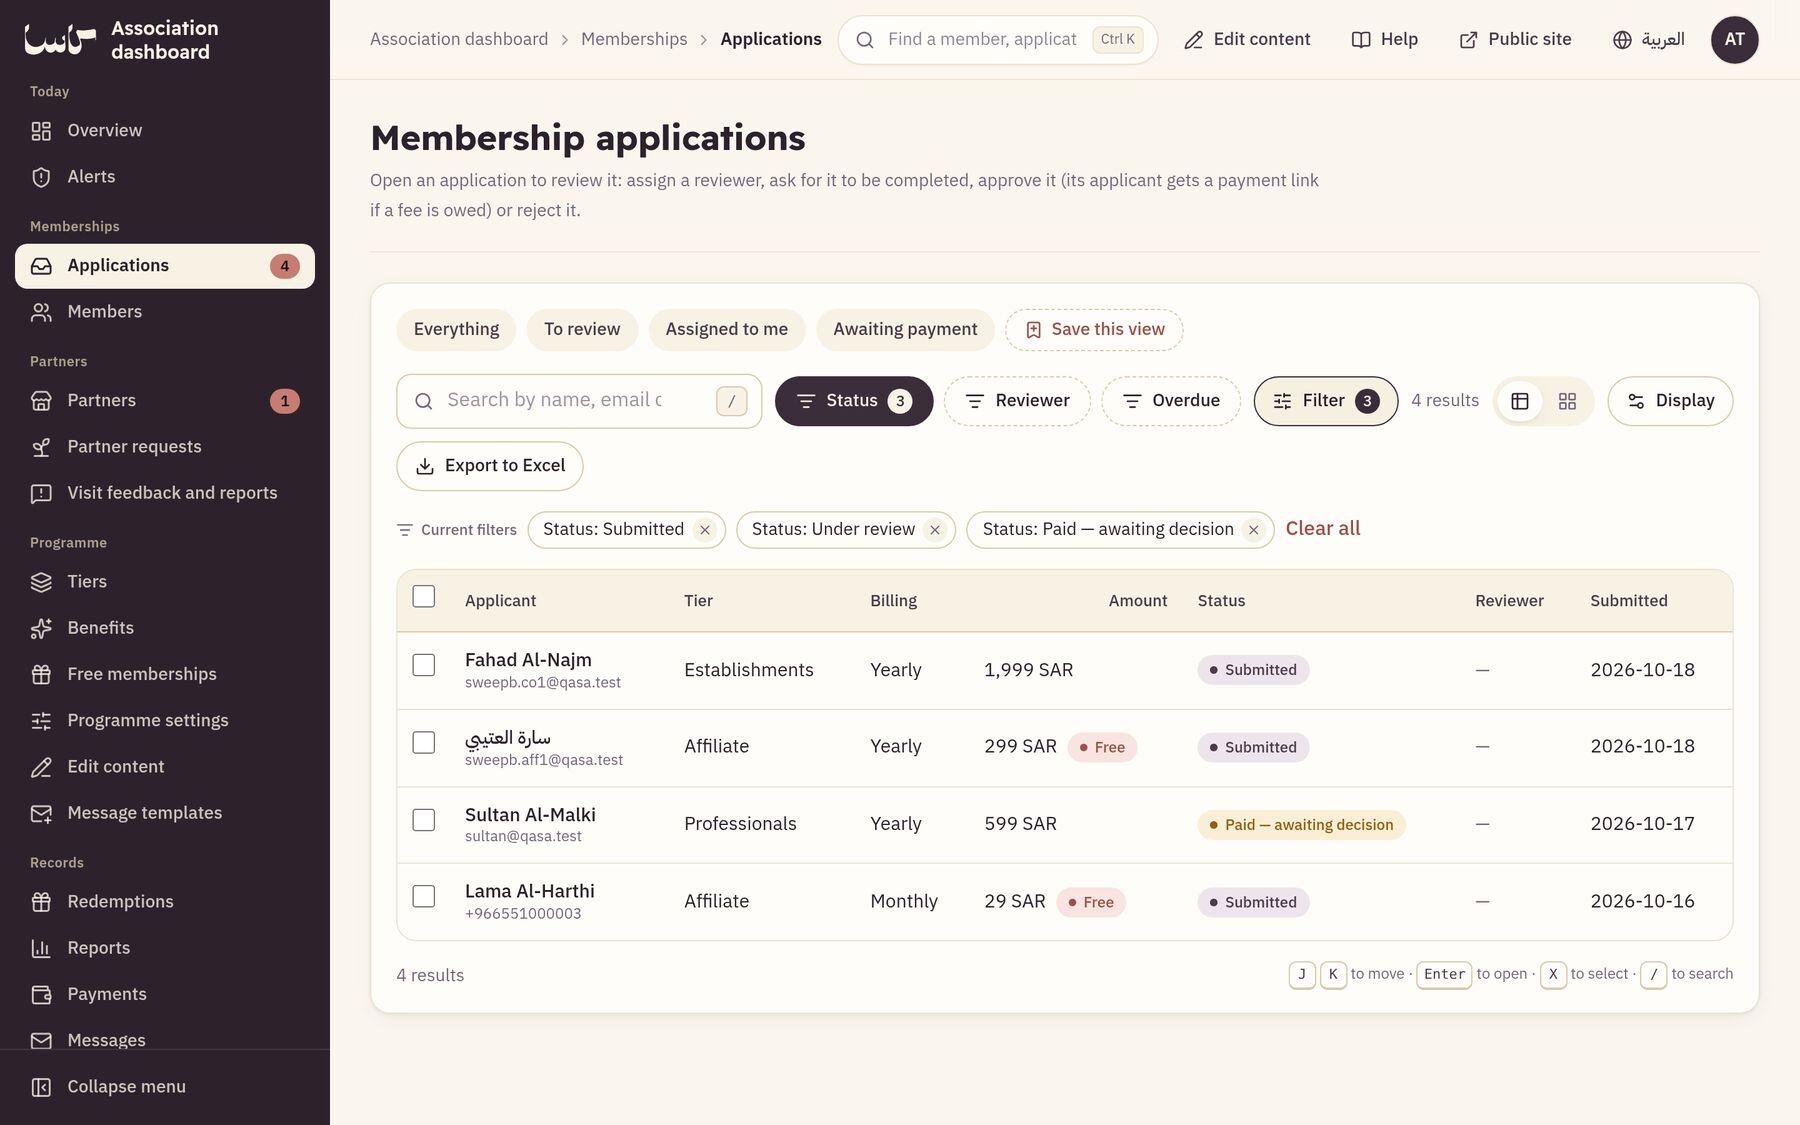
Every application is reviewed first, then approved or rejected; approval sends its applicant a payment link when a fee is owed.
 126
- Open “Applications”; the list starts on those “To review”. Choose “Assigned to me” or “Overdue” to narrow it.
- Press an application to see the applicant’s details, their tier answers and documents (“Open” or “Download”; the links last a quarter of an hour), free place and payments, and the “Possible duplicate” badge if any, then “Start reviewing” or “Assign” it to a colleague.
- If something is missing, press “Ask to complete”, write what is needed, pick from “Documents to upload” (or “Another document, not on the list” by name), then “Send the request”; the application cannot come back without them, and returns to you when its applicant sends them.
- To approve, press “Approve”: if a fee is owed, press “Approve, send the link” and it becomes “Approved — awaiting payment”; if it is paid or on a free place, “Yes, approve and issue the membership” makes it “Active” at once.
- To reject, press “Reject”, write a kind note that reaches the applicant, then “Yes, reject the application”.
- For several at once, tick them, then choose “Approve selected”, “Ask to complete” or “Reject selected”. At the end you see what was done, what was not, and why.
Up close— The parts the steps talk about, enlarged.
-

The ready-made views above the list
-

An application’s row
Chapter 3
Payment after approval: the payment link
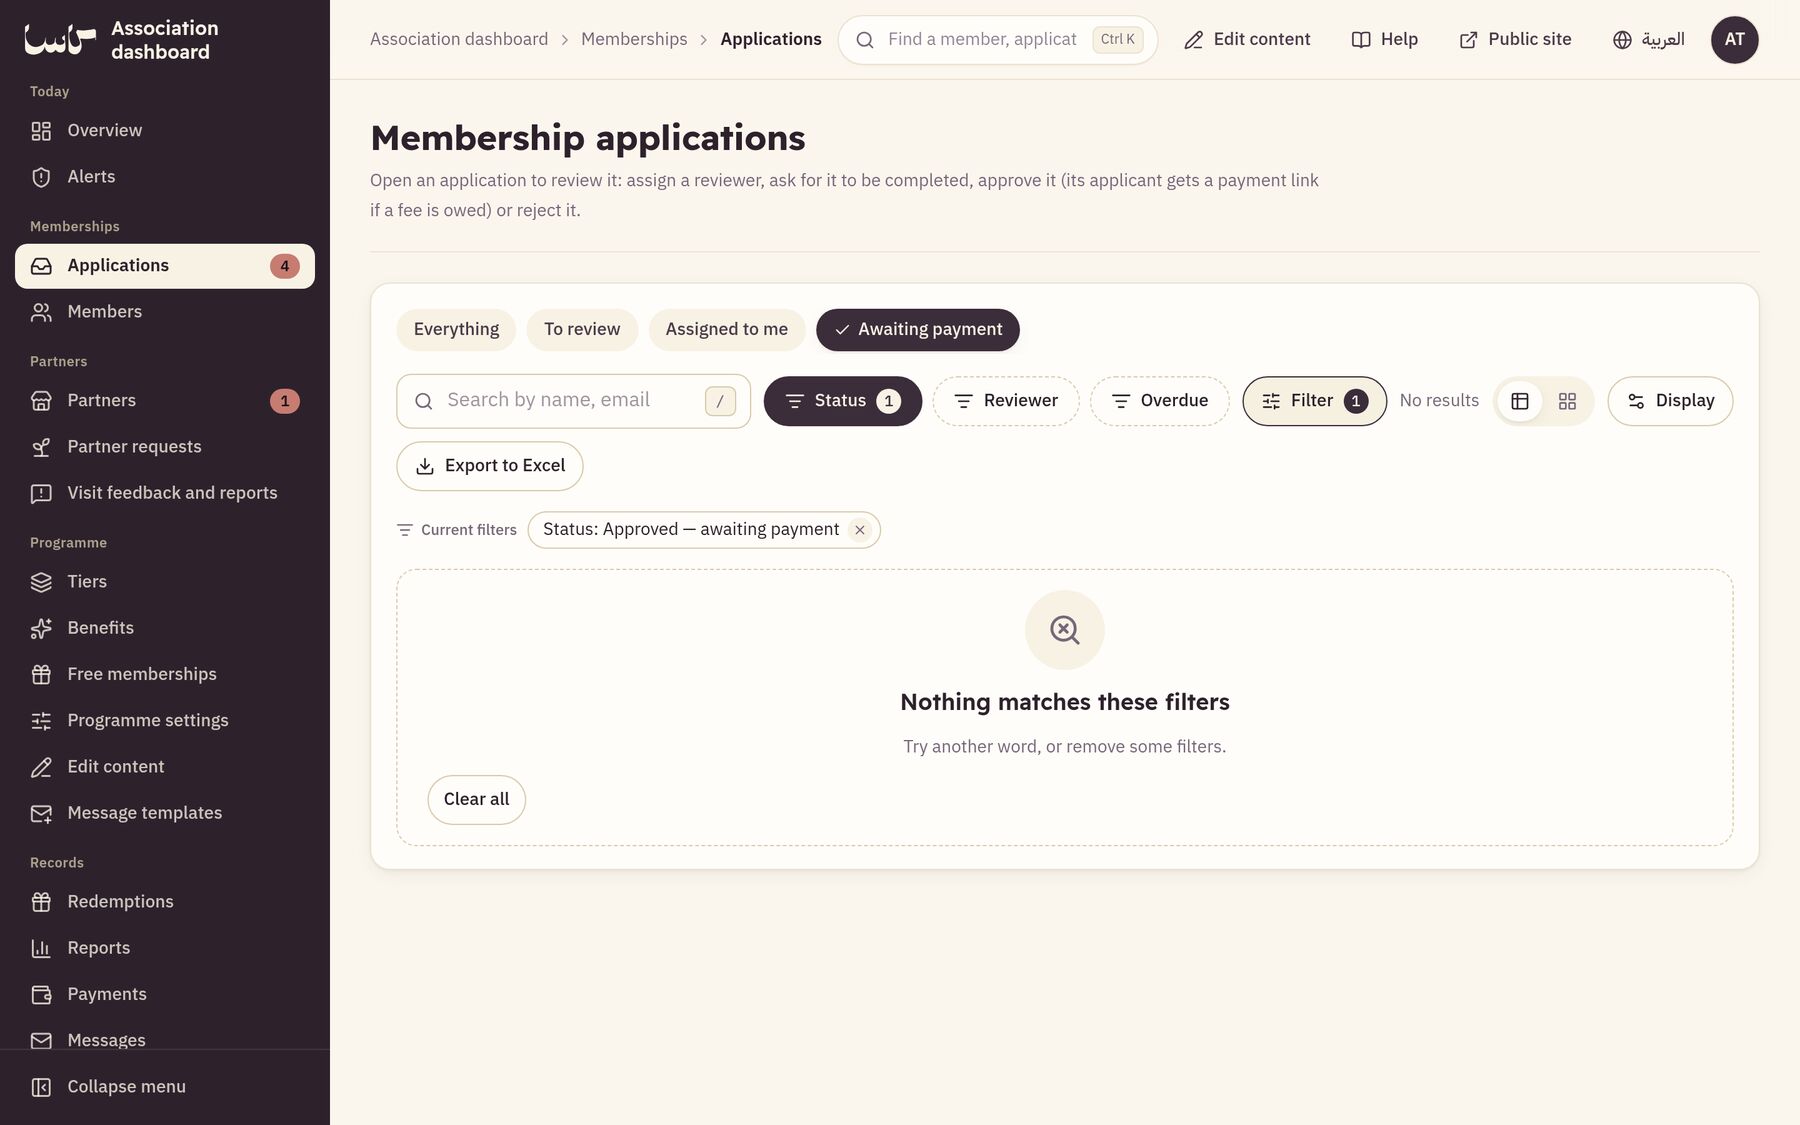
After approval the applicant pays through the online payment link, and the card is activated the moment they pay.
 12
- In “Applications”, choose “Awaiting payment” to see approved applications not paid yet.
- Open the application to see the payment link its holder received and the “Payment window until” date.
- When the applicant pays, the membership is activated at once and they get a message with the card.
- An application not paid within its window closes by itself as “Payment window closed”.
Up close— The parts the steps talk about, enlarged.
-

The current filter: awaiting payment
Chapter 4
Members: the file, renewal and suspension
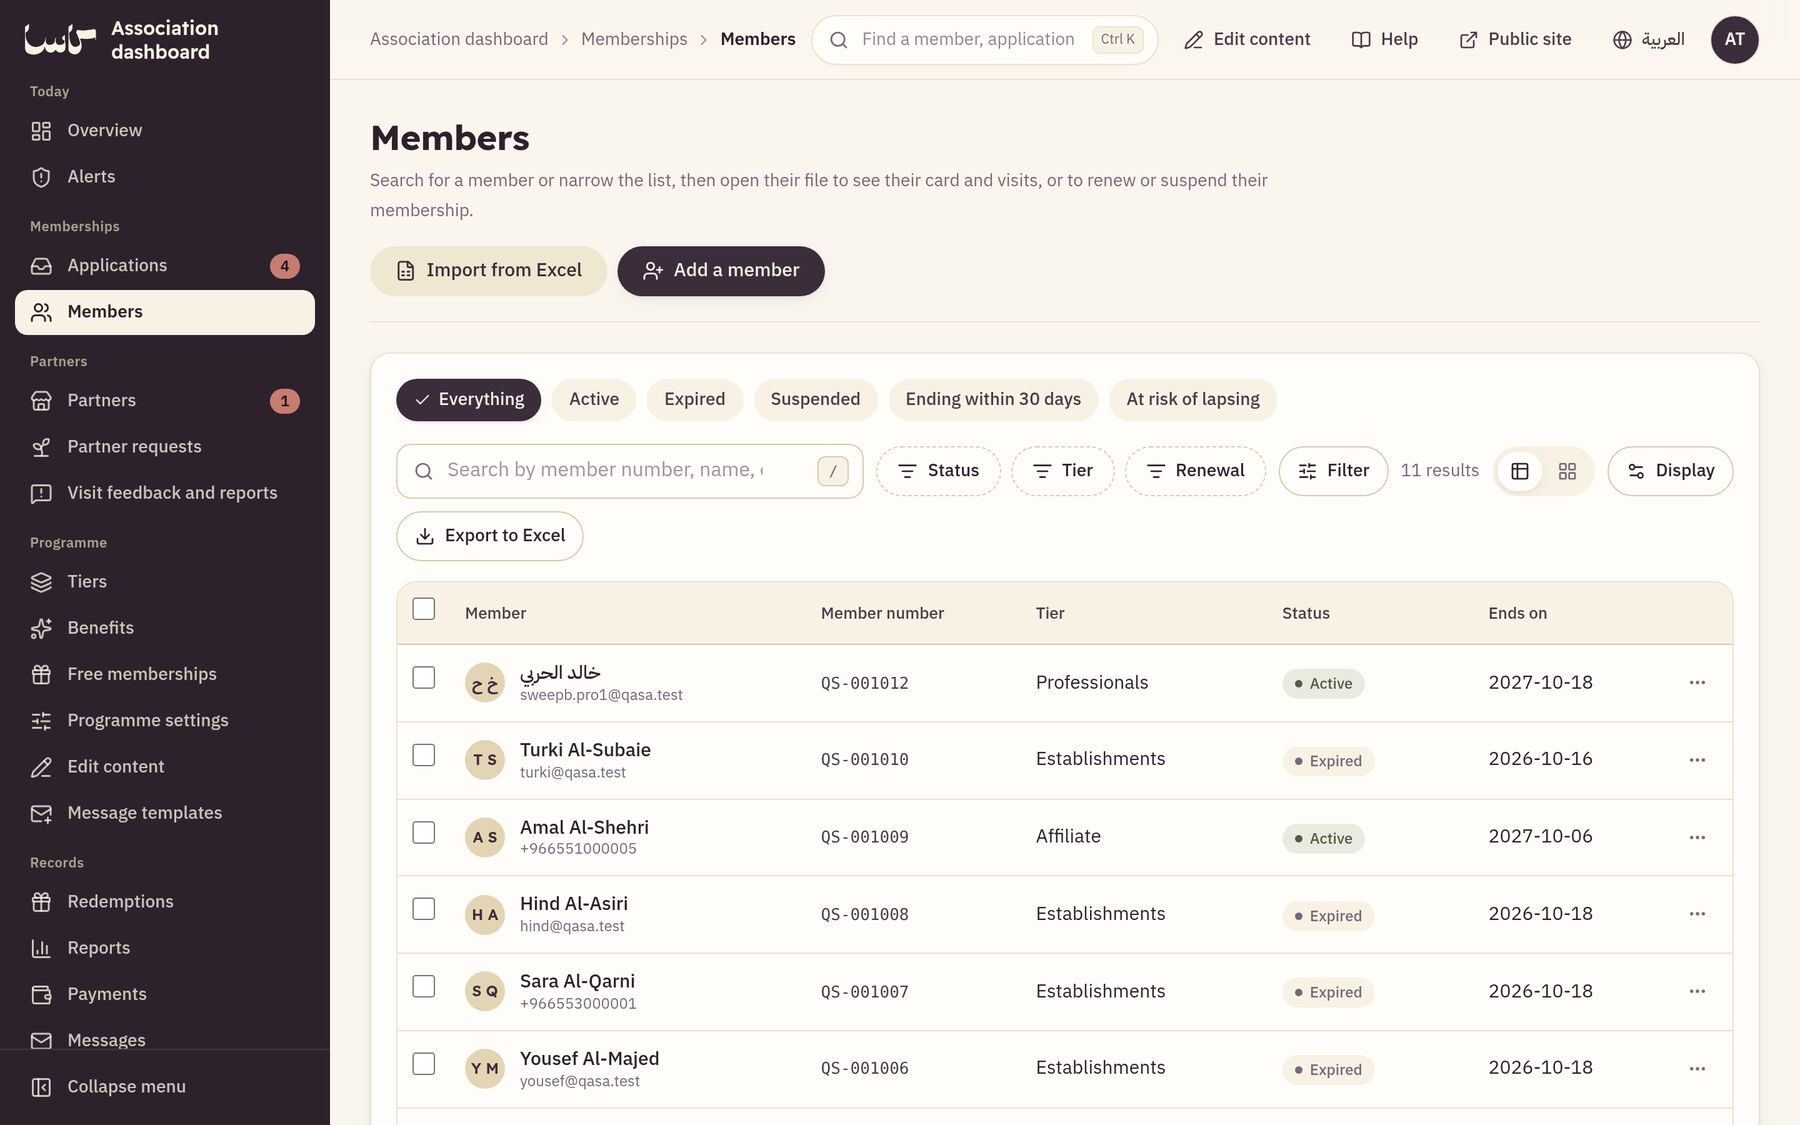
Find any member and open their file to see their whole story and act on it.
 12
- Open “Members” and search by member number, name, email or mobile, or filter by status, tier and “Renewal”.
- Press a member to open their file: status, term, what they saved with coupons, how many they bought and collected, and “The whole story” with every application, payment, coupon and message.
- To renew at the desk, press “Renew”, choose “Renew for”, answer “How was it paid?” with its reference, and press “Record and renew”, or “Renew without charge” with a reason.
- To suspend press “Suspend”, write the reason, then “Yes, suspend the membership”; the membership and card stop at once.
- To bring it back, press “Lift suspension”. The suspended time is not given back.
- If the member lost their phone or their code leaked, press “Replace the card code”.
Up close— The parts the steps talk about, enlarged.
-

Search, filters and export
-

A member’s row
Chapter 5
Establishments: branches, products, coupons and agreements
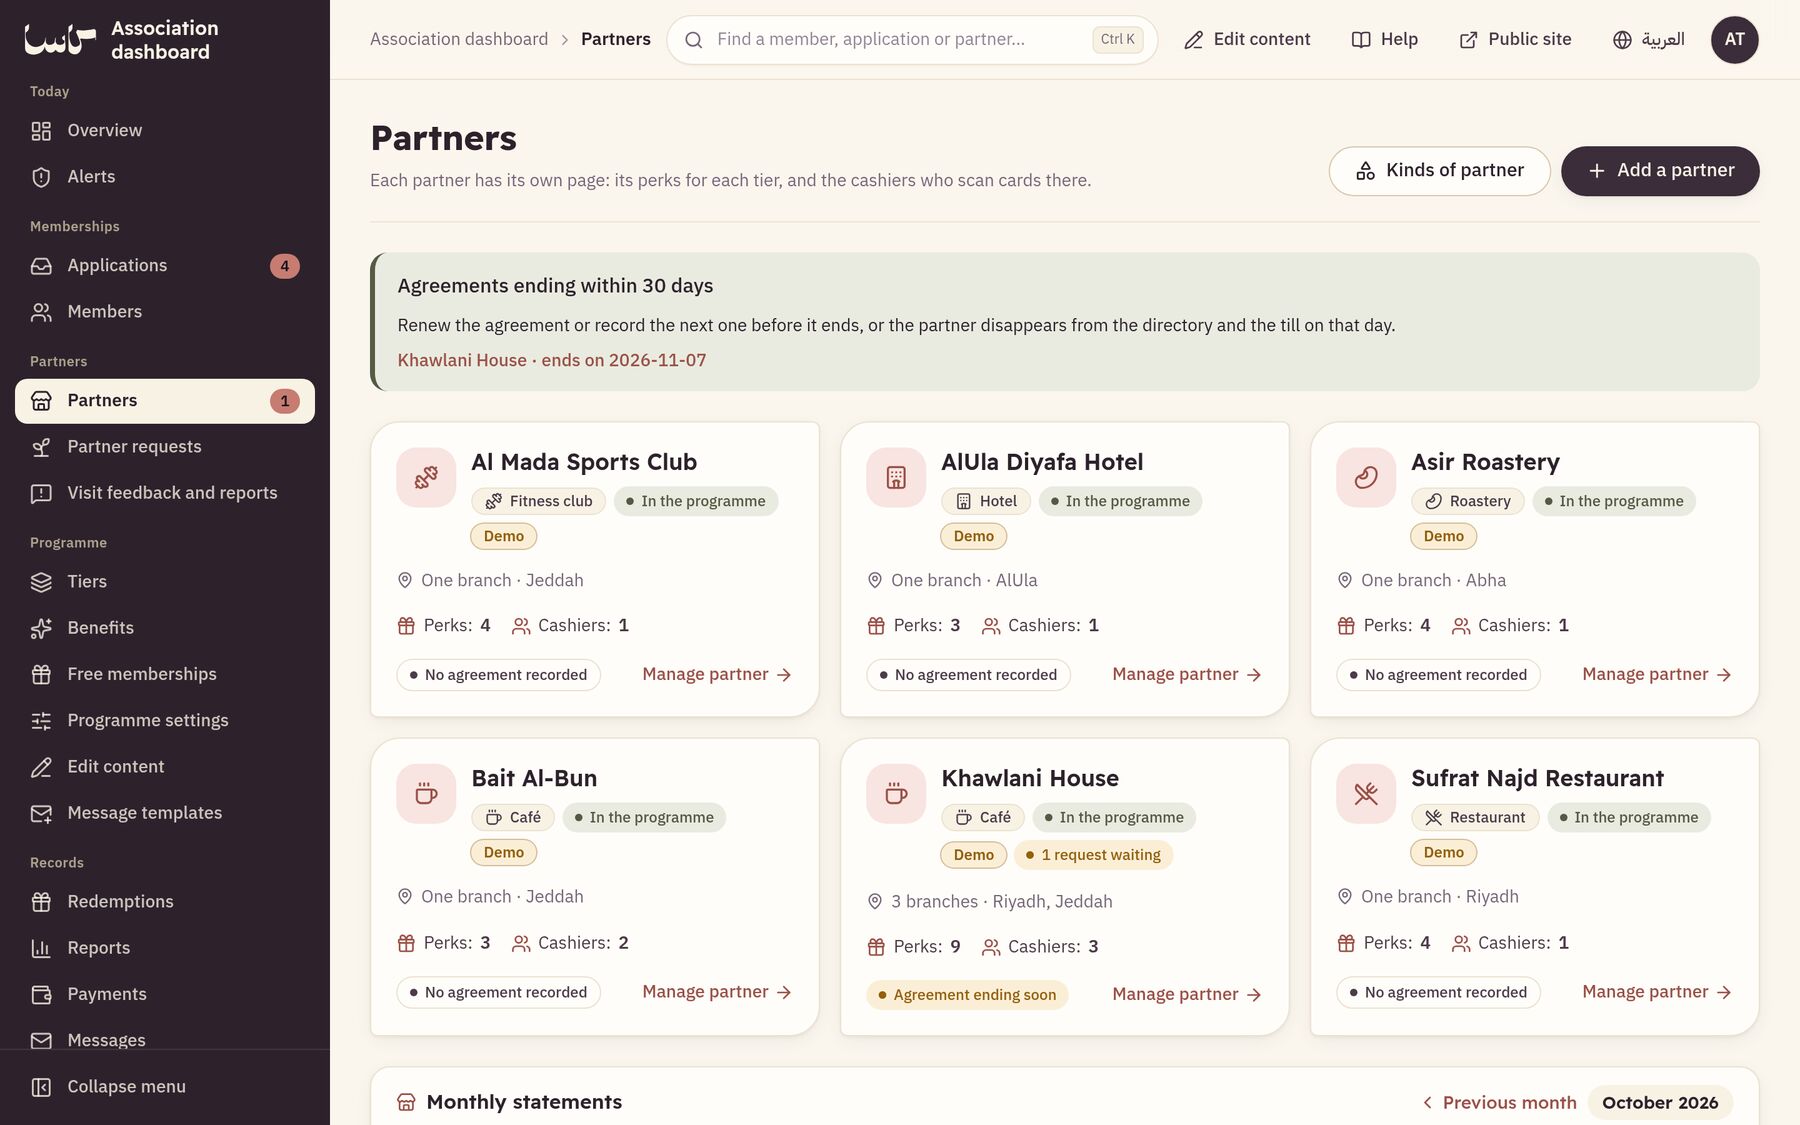
Each establishment has its own page: its kind (café, restaurant, fitness club, hotel…), its branches in cities and districts with their hours, photos and cashiers, its products and its supply agreements.
 126
- Open “Establishments” and press “Add an establishment”: its kind and its name in Arabic and English. To add a new kind, open “Kinds of establishment”, then add one.
- Press the establishment to open its page, then under “Branches” press “Add a branch” (or “Edit branch”): the city, district, address and location, “Choose a photo” for the branch picture, and “Branch open”.
- Each branch has “Edit hours” for each day’s hours; under its cashiers, press “Add a cashier” and write their email or mobile, or “Remove”. A cashier sees their own branch only.
- Under “Products”, approve the establishment’s products and set their sale price, then add them to the supply agreement.
- From “Coupons”, create a coupon for each product in the agreement with its usual price, sale price and term; it then shows in the store and on the establishment’s page.
- Under “Partnership agreements” press “Record an agreement” with its dates, file and supply model, and add the venue's products with their supply price and quantity. The “Settlement statement” gathers what sold and was collected, what was paid and what is owed, with an Excel download.
- To take an establishment out of the programme for a while, switch off “In the programme” in “Edit establishment details”; it then hands over no coupons and leaves the directory.
Up close— The parts the steps talk about, enlarged.
-

An establishment card
-

The monthly statements
Chapter 6
Establishment requests
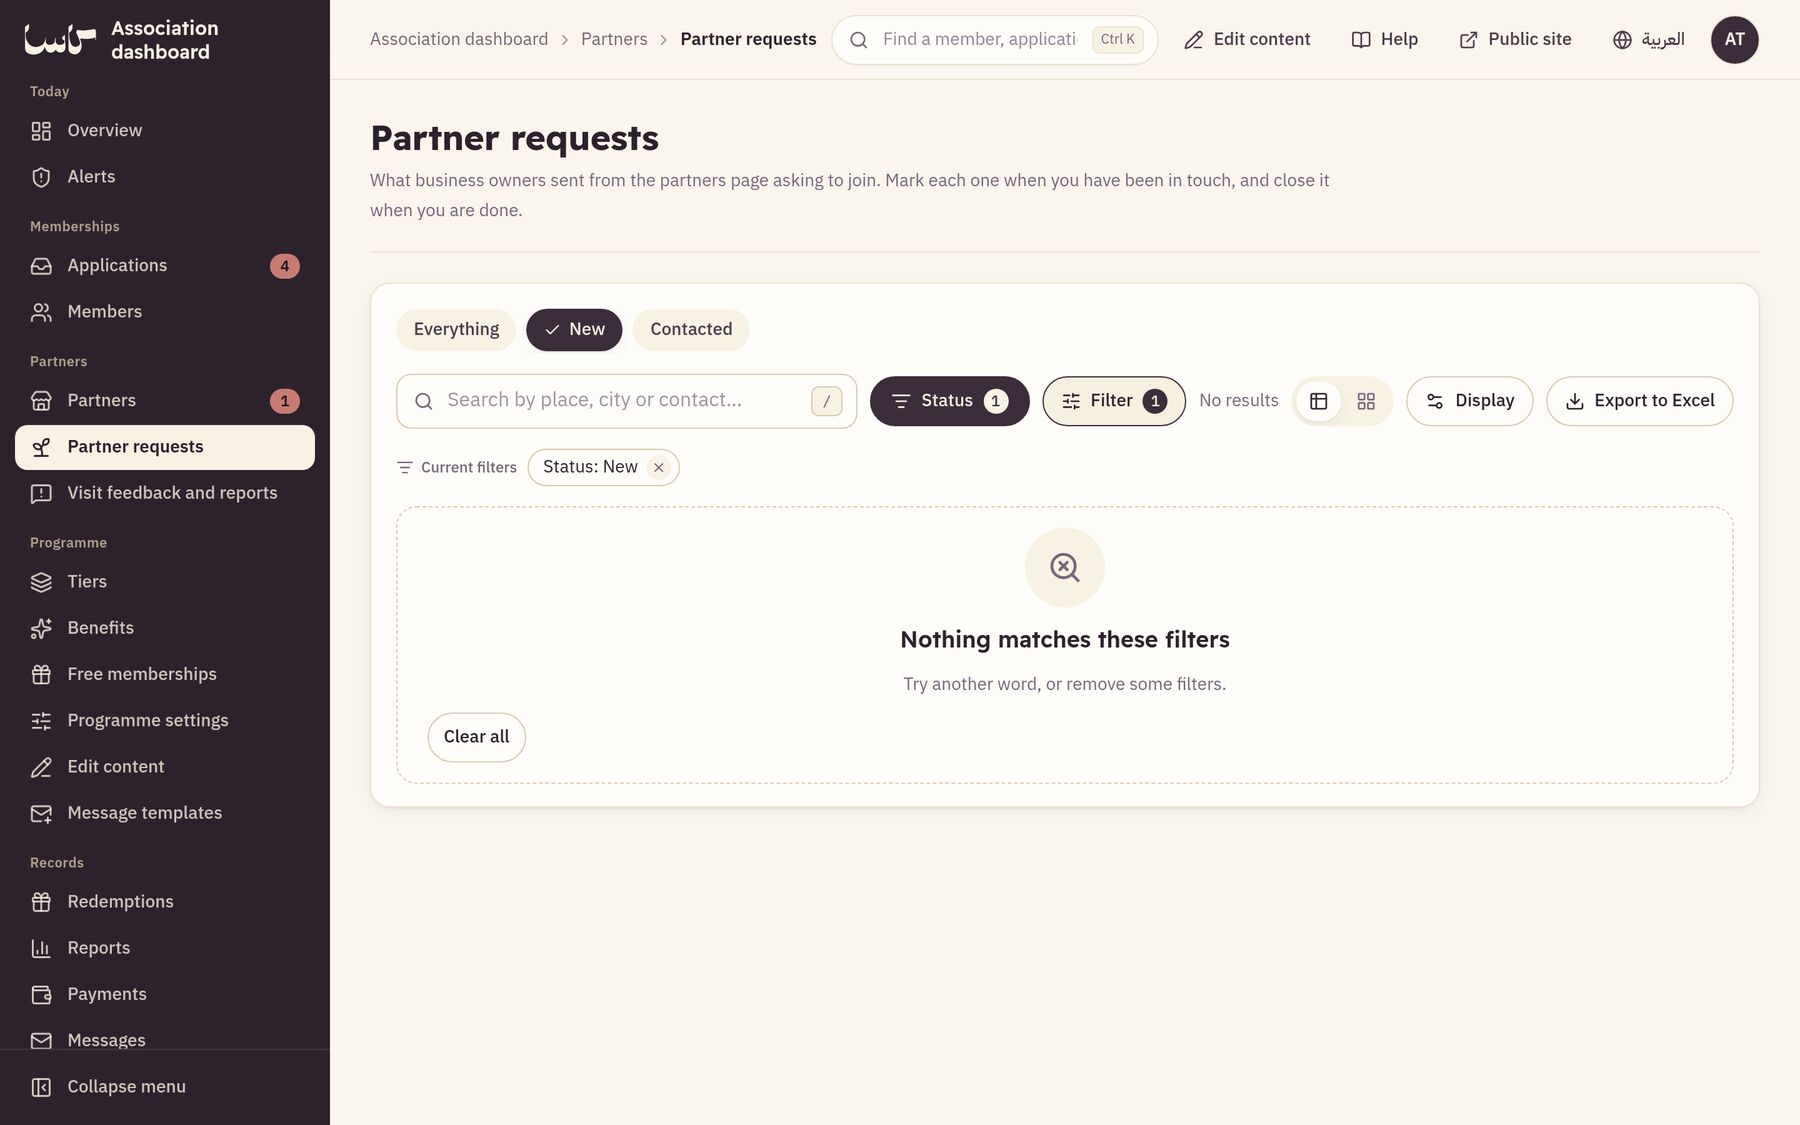
What business owners send from the establishments page with “Become an establishment”, asking to join.
 12
- Open “Establishment requests”; the list starts with the new ones.
- Read the place’s name, city, link and how to reach them.
- Once you have been in touch, press “Contacted”; when you are done, press “Close”.
- For several at once, tick them and choose “Mark contacted” or “Close them”.
Up close— The parts the steps talk about, enlarged.
-

The views: new and contacted
Chapter 7
Coupons: cards and issued coupons
The association offers coupons from the products of supply agreements, and follows each coupon a user bought until it is collected.
- Open “Coupons”. Under “Products ready to offer” press “Make a coupon” beside the product, write the price, quantity, sale window, validity and branches, then “Publish”.
- Open the “Issued coupons” tab to see every coupon: search by number, pickup reference, holder name or mobile, and filter by state.
- A coupon “held for review” (after five wrong tries) can be reinstated, cancelled or refunded. Their count shows as a badge in the side list.
- If the venue could not serve the product or a branch closed, press “Extend validity” on the coupon, or “Extend all of this card's coupons” from the card's details.
- Cancelling and refunding need a reason the holder sees, and the coupon goes back to the store's available quantity.
Chapter 8
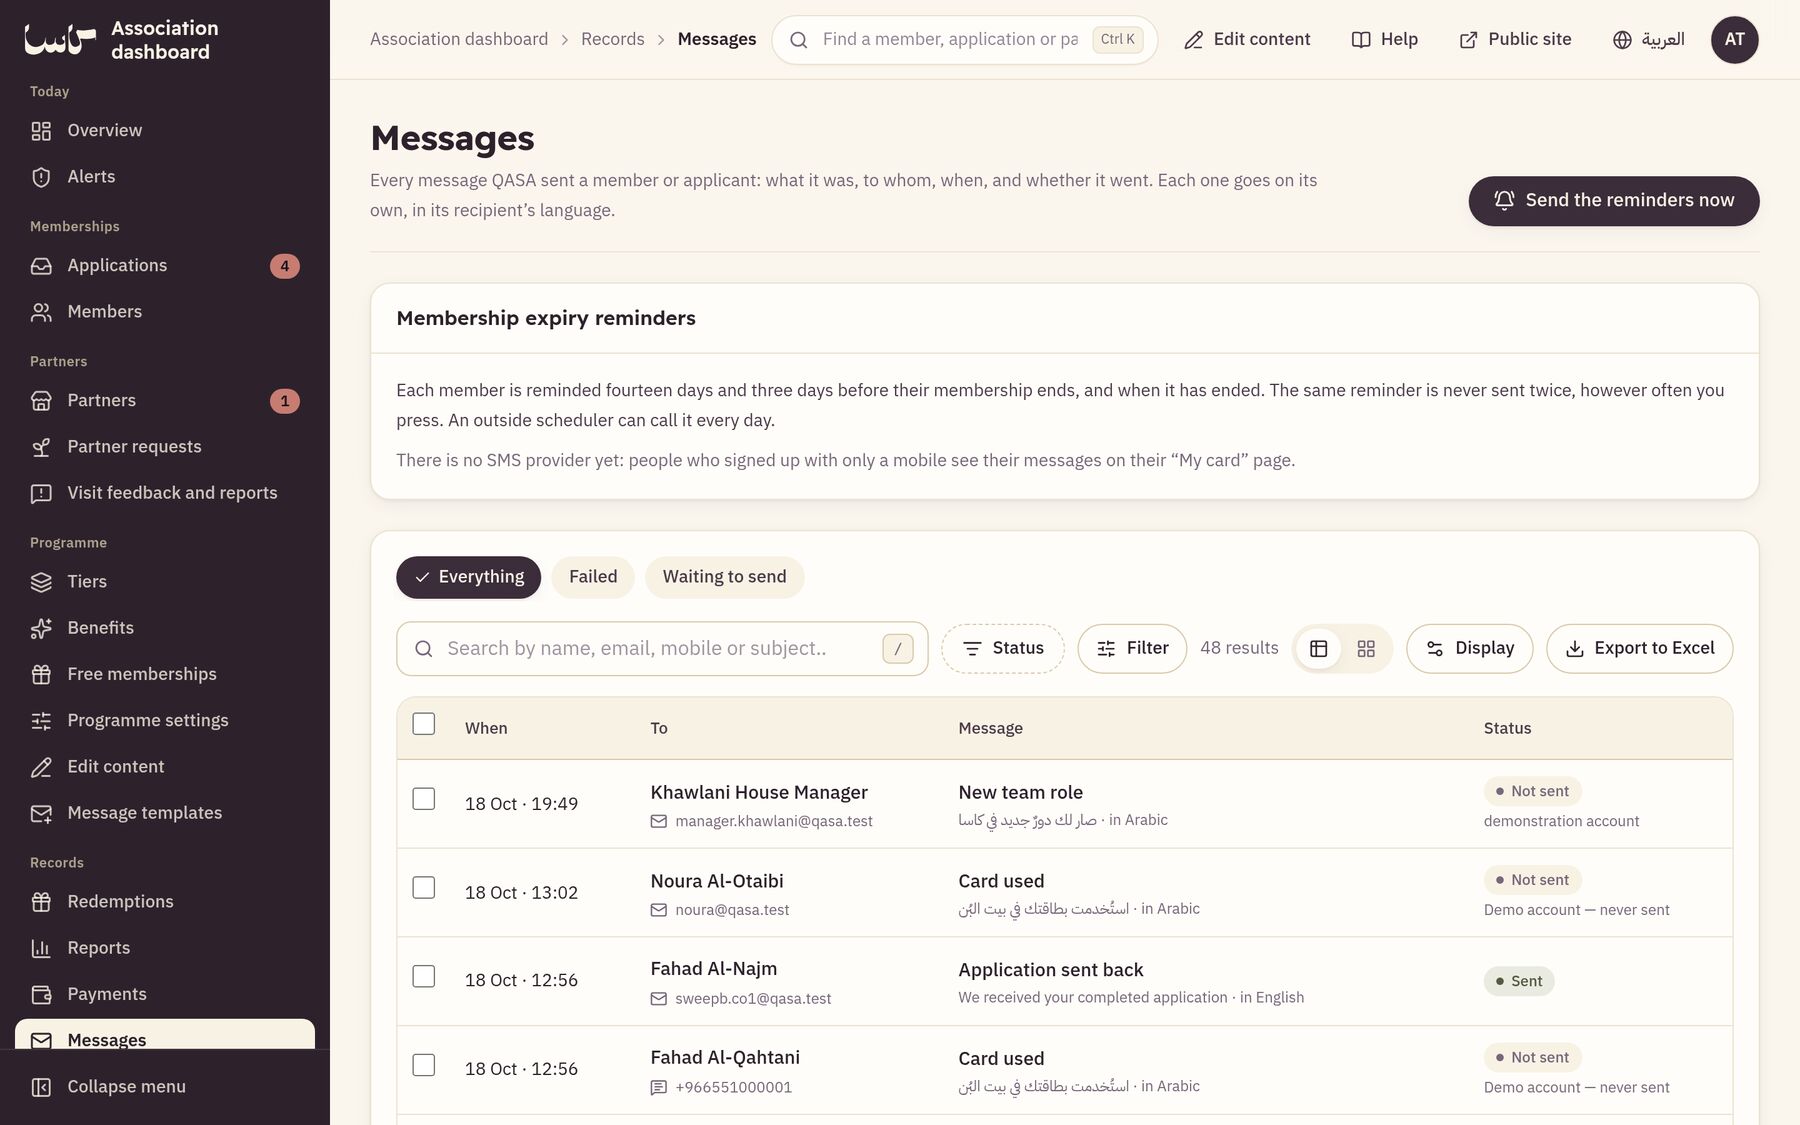
The messages log and reminders
Every message Qasa sent a member or an applicant: what it was, to whom, when, and whether it arrived.
 234
- Open “Messages”.
- Filter by status: “Sent”, “Waiting to send”, “Failed” or “Not sent”.
- Press “Read the text” to see the message as it was received.
- Press “Send the reminders now” to send the expiry reminders that are due: two weeks before, three days before, and on the day it ends.
- A message that fails is retried by itself three times, then shows as “Failed”.
Up close— The parts the steps talk about, enlarged.
-

Views by message status
-

A message’s row
Chapter 9
Export to Excel and saved views
Every list in the dashboard exports to an Excel file with whatever your current filters match.
- Filter or search the list until it shows what you want.
- Press “Export to Excel”, or tick rows and press “Export the selected”.
- Keep your usual filters under “Saved views” to come back to them in one press.
- Every export is written to the audit log under your name.